One of the crucial perfect tactics to procure assets, build up your Infamy Rank, and acquire XP in Cranium and Bones is thru Plundering. This selection means that you can tackle a complete agreement, guard towers, and a number of other ships all within the title of securing some treasured loot.
The Plundering device in Cranium and Bones can also be relatively difficult while you first see it, although. You’ve got the solution to Plunder a plethora of small settlements around the map, which starts a staged engagement you wish to have to live to tell the tale with a view to protected the utmost quantity of rewards. To look precisely how one can Plunder your strategy to victory in Cranium and Bones, check out the information under.
How Plunder works in Cranium and Bones
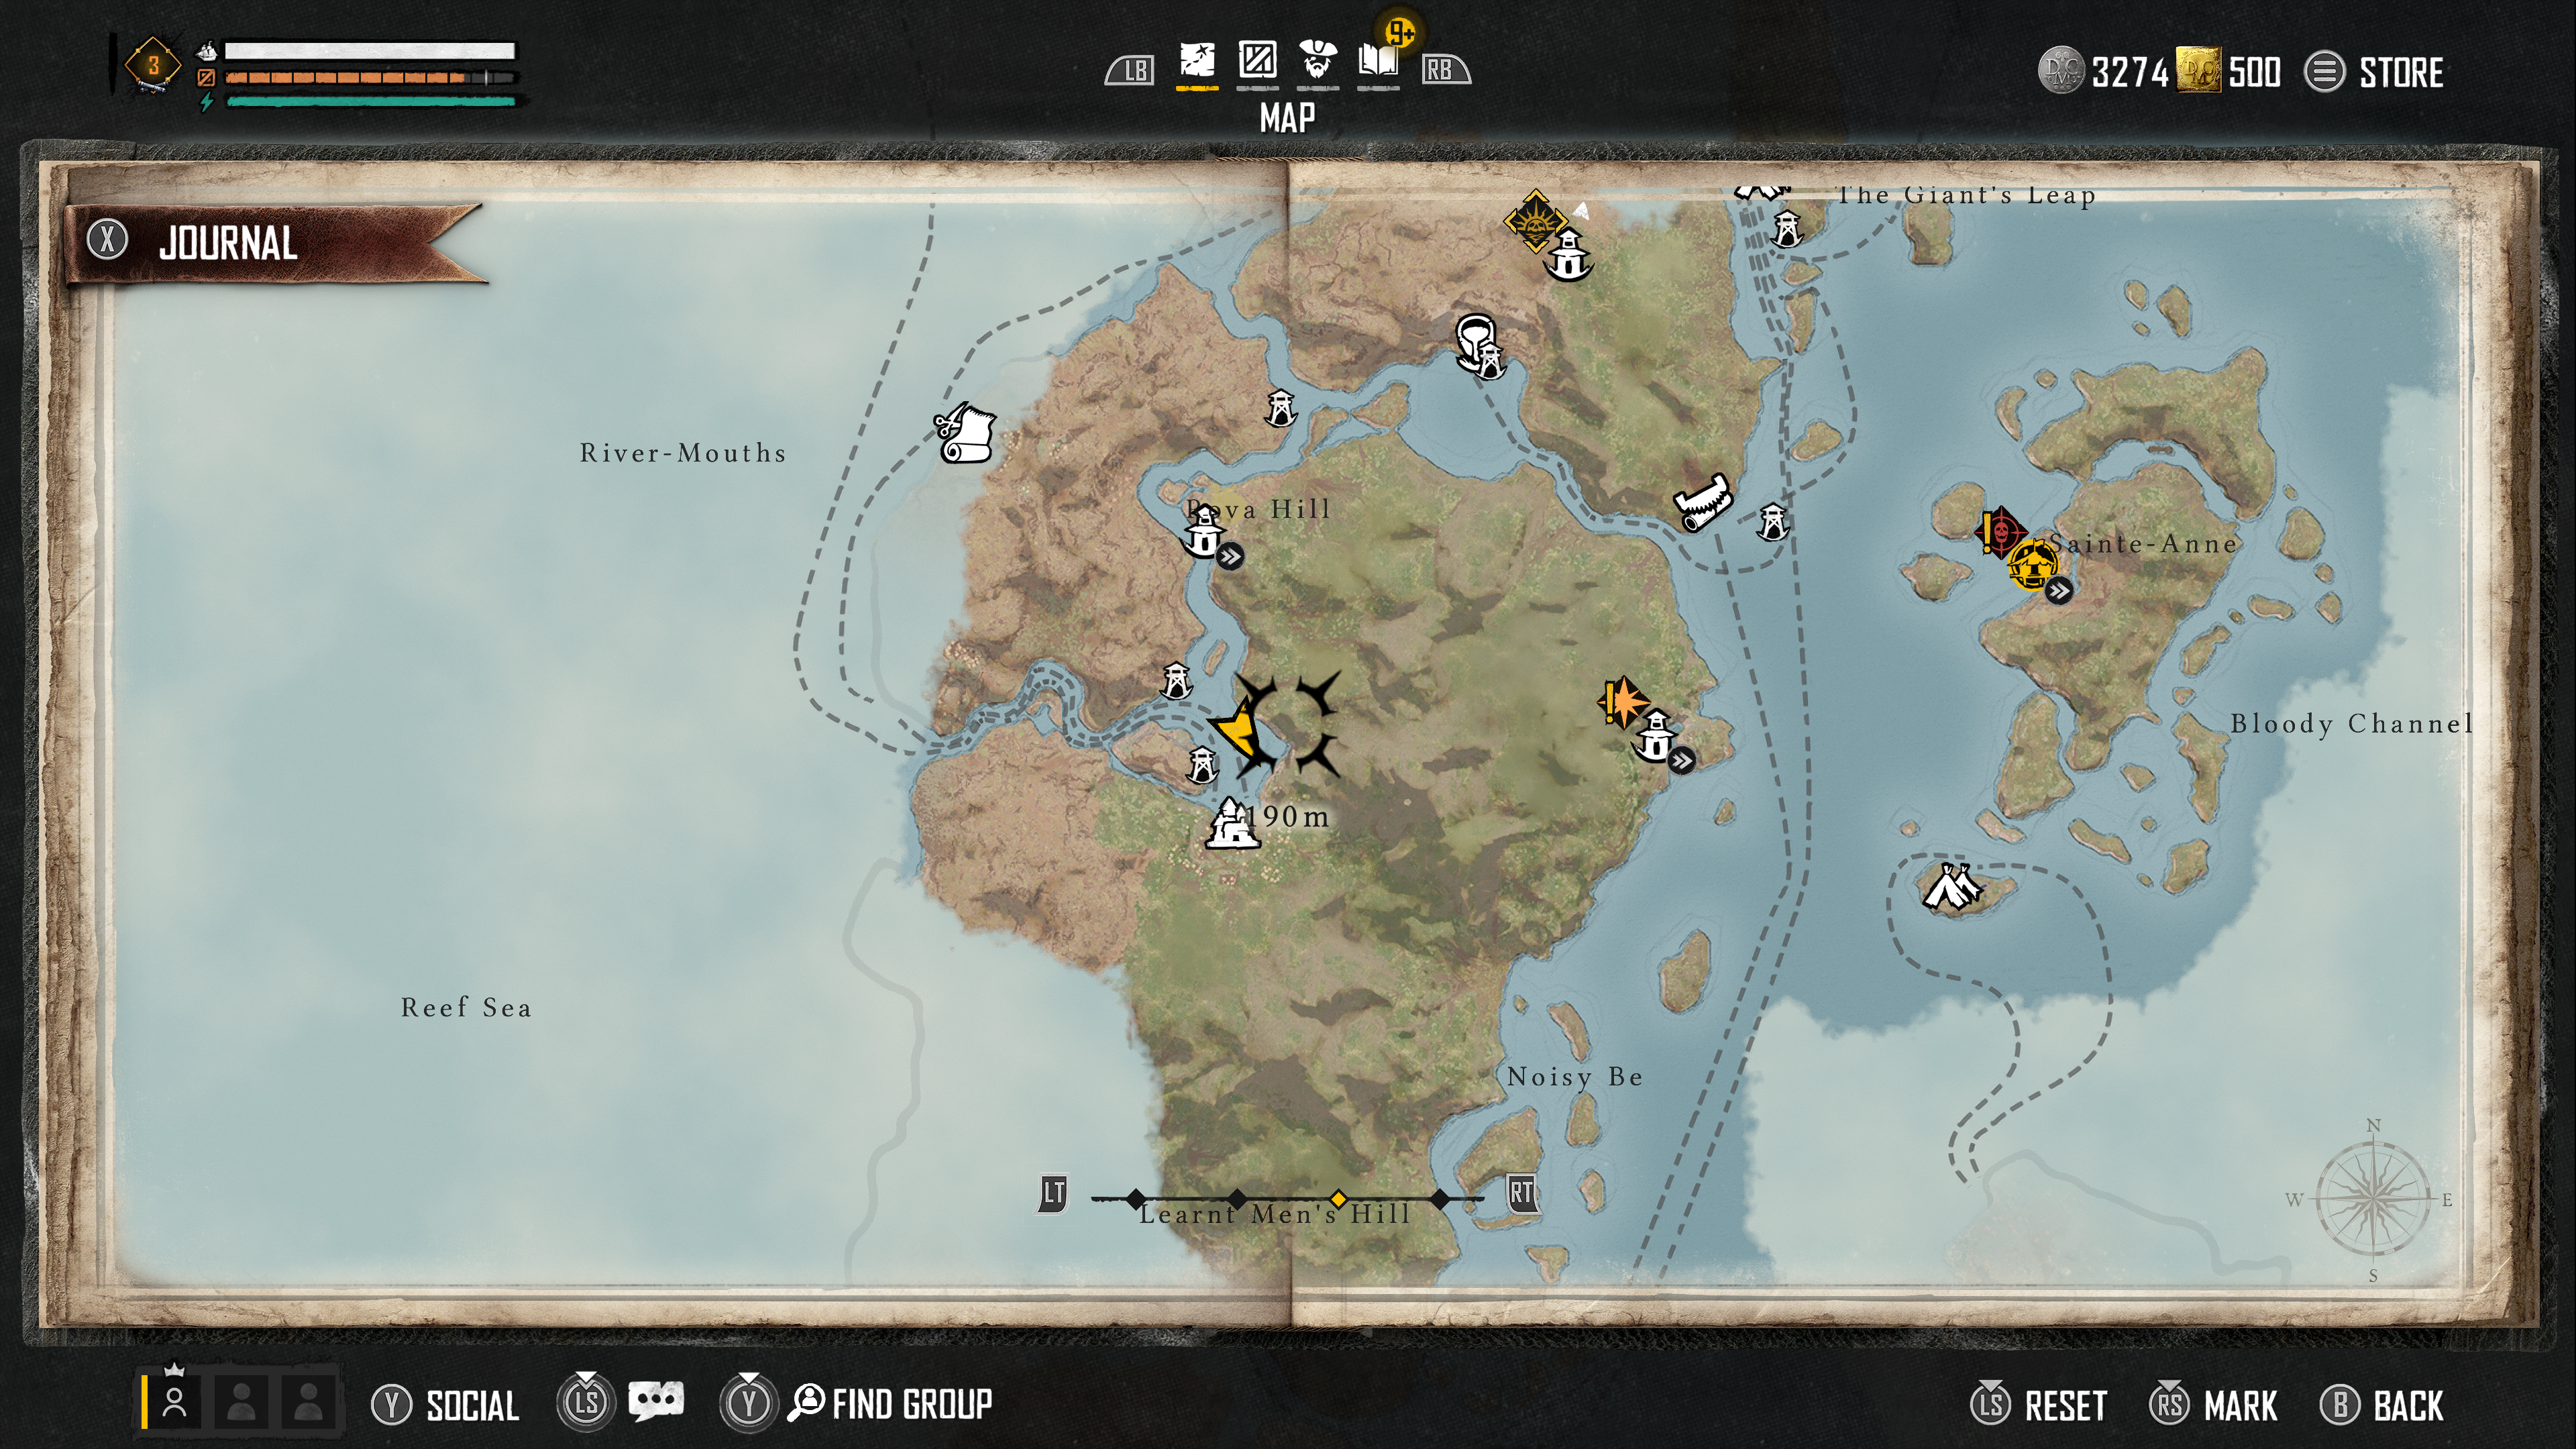
At the beginning, you’ll best Plunder settlements that you are not able to dock at at the map. This implies a agreement like Sainte-Anne or the Sacred Tree cannot be plundered. As an alternative, you wish to have to search for settlements that should not have the quick go back and forth icon on them or are surrounded by means of a guard tower or two. As you’ll see within the screenshot under, my send is true close to two guard towers together with a small agreement.
While you method such a settlements, two choices will seem for your display: “Have interaction” and “Plunder.” If you select the engage choice, a menu pops up that lets you business with the agreement. You’ll be able to additionally whole contracts and different quests this fashion.
The Plunder choice rolls a small cutscene that presentations a few of your team contributors getting off the send. After the cutscene performs, you can be in struggle with the agreement and any guard towers which might be close by. On the best of your display can be textual content that claims “Kill all enemies” and two icons, considered one of a tower and any other of a boat. If both of the ones icons is lit pink with a host subsequent to it, you wish to have to get rid of no matter it is telling you.
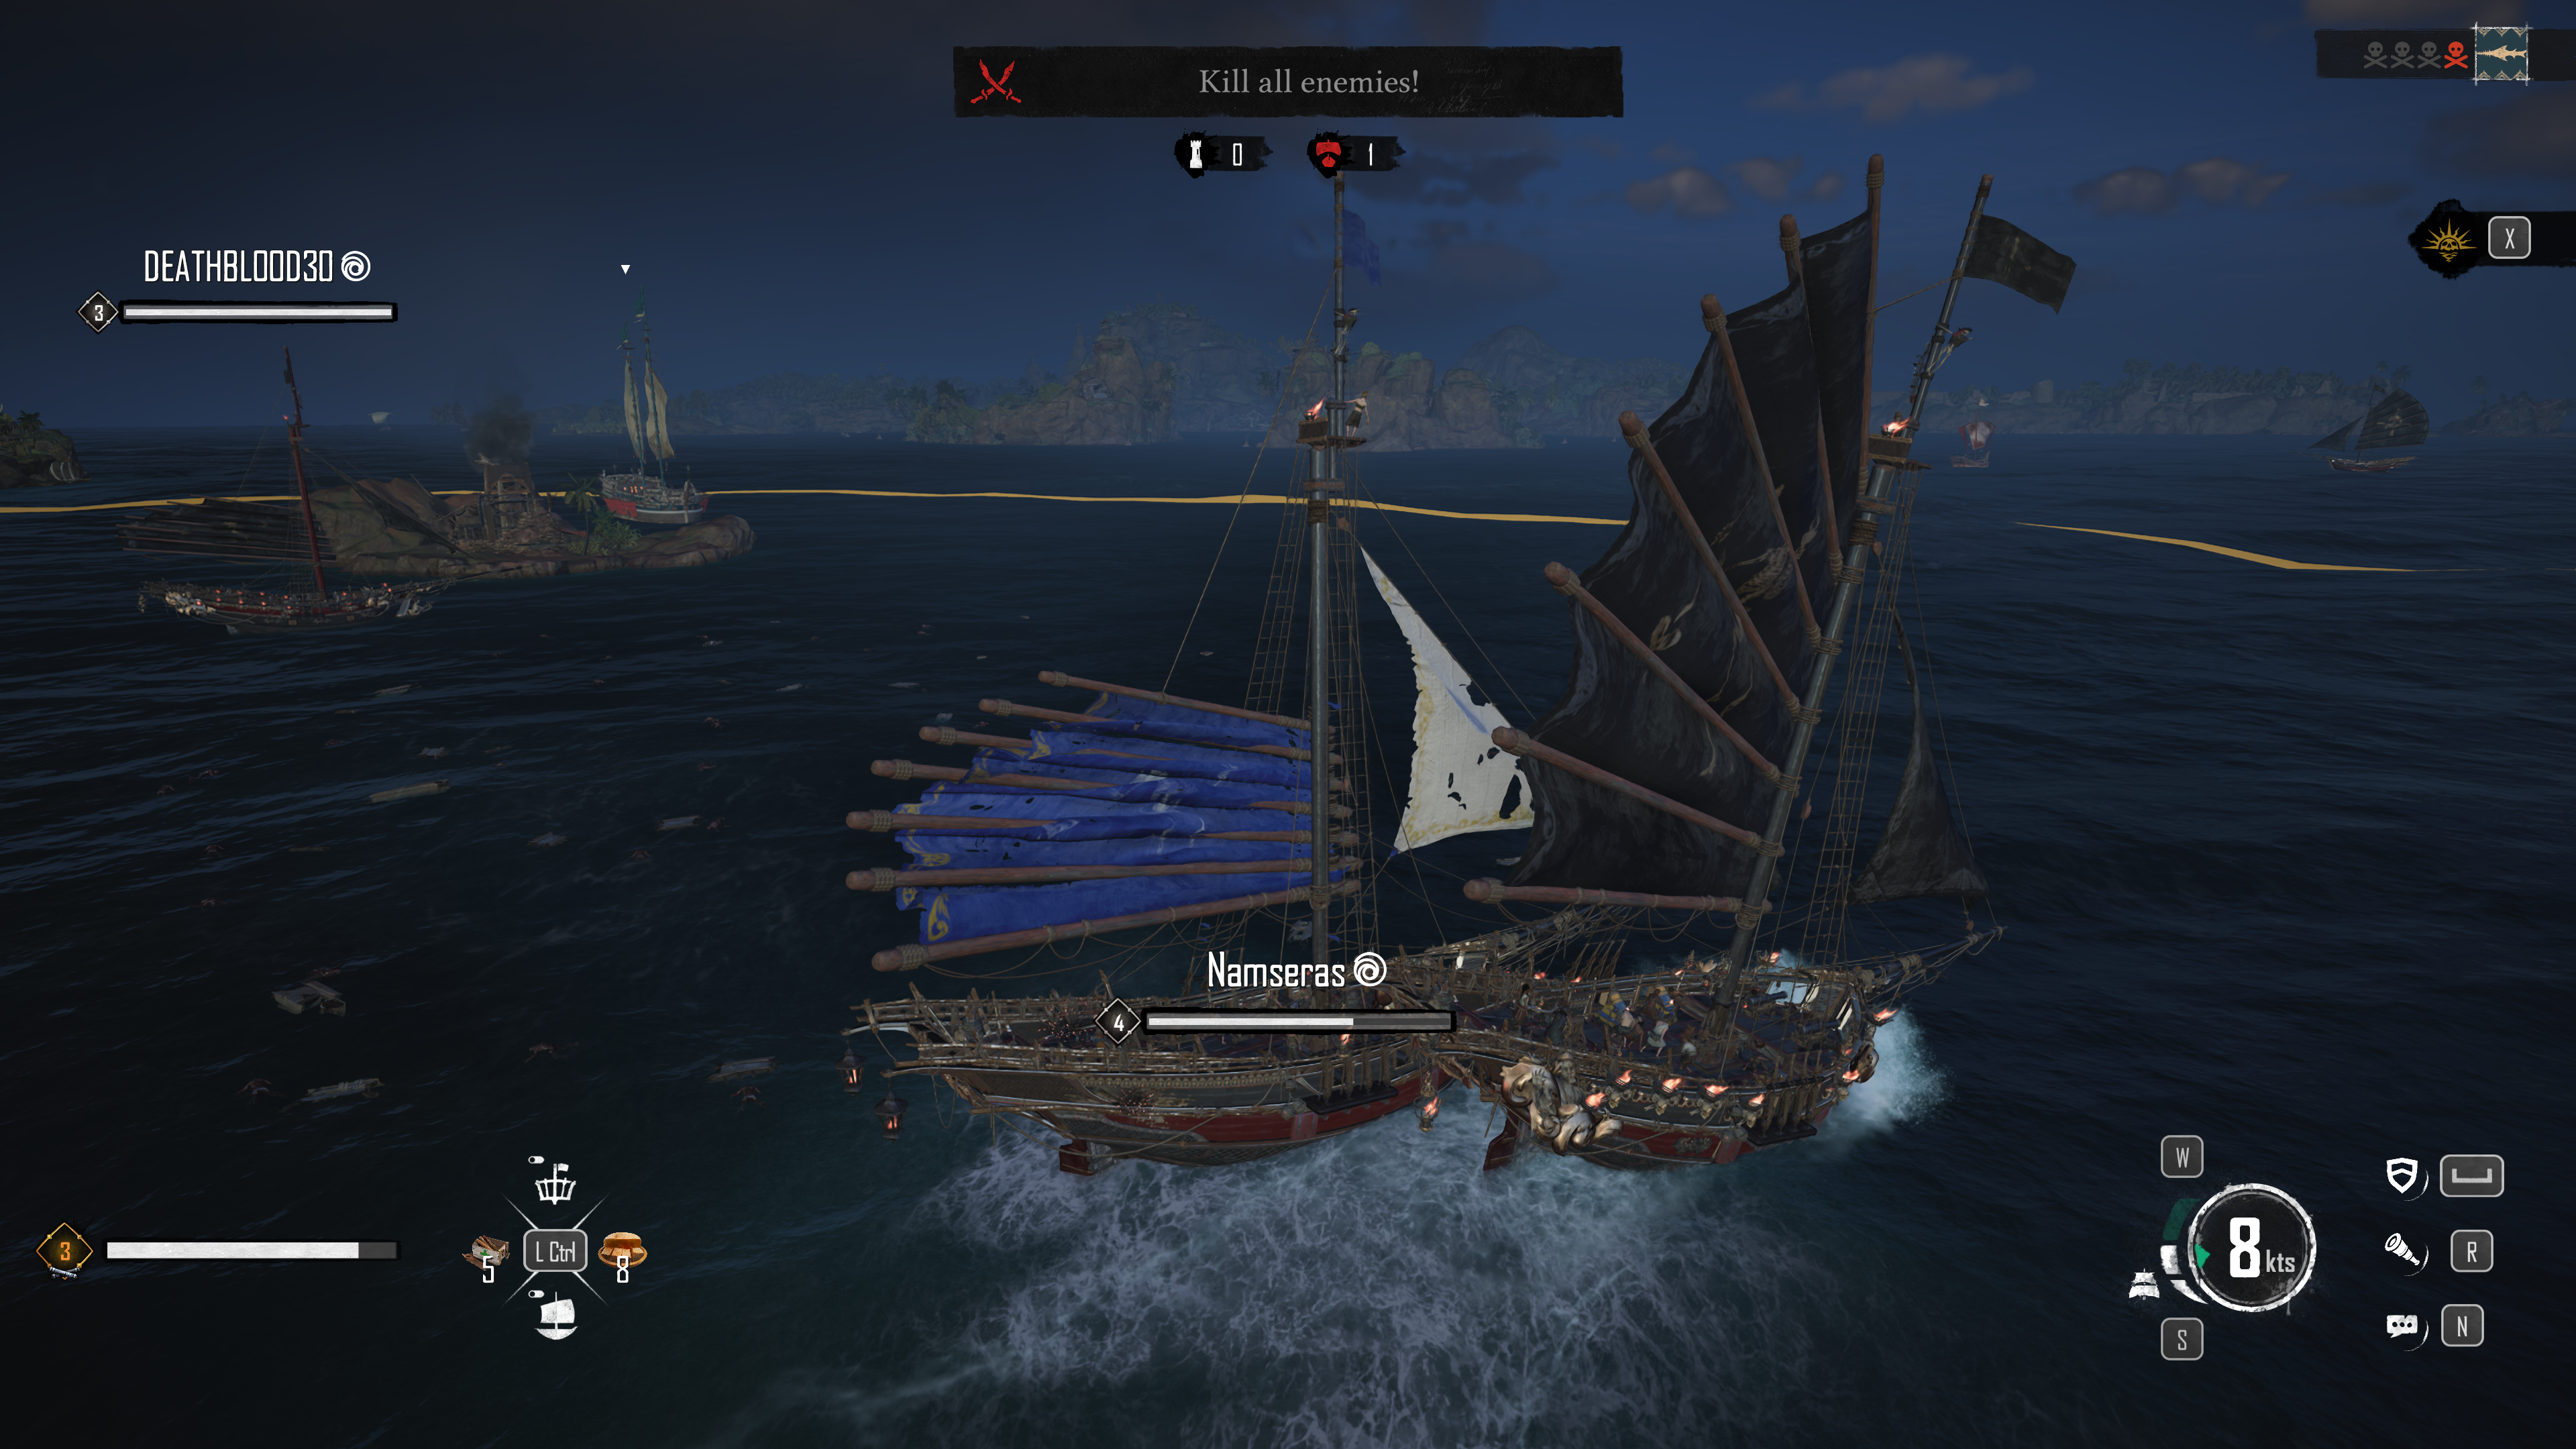
For instance, should you see the send icon is pink with a “1” subsequent to it, there’s a unmarried send close by you wish to have to take down, both by means of sinking or boarding it. If the tower icon is pink, you wish to have to burn up the HP of any close by guard towers or the agreement itself. After you have eradicated the whole thing you wish to have to, you can see a gold treasure chest icon seem for your HUD. Pass over to the icon’s location to loot your rewards.
You can additionally see 4 treasure chest icons on the best of your display, which point out your present growth within the Plunder. To totally whole a Plunder, you wish to have to loot 4 treasure chests, because of this getting rid of 4 levels of enemy ships/towers. Every level brings new enemies to defeat, and you have got to defeat them time and again to finish the Plunder. After each and every level is completed, you’ll loot any other treasure chest within the water.

When the overall chest has been looted, a cutscene performs appearing your team coming again aboard the send and you can get a notification for your display that claims “Plunder Finished.” You’ll be able to ultimately return and Plunder the similar location once more, however best after a cooldown duration has handed.
Plundering is a high-risk, high-reward process in Cranium and Bones. You’ll be able to make out like a bandit with a ton of loot, however there also are more than one enemies all looking to take down your send without delay. I like to recommend beginning within the lower-level spaces of the map while you first attempt to Plunder a agreement and best paintings your method up after you have upgraded your send’s armor and guns.

